Push-to-Open Kitchens.
Completely flat fronts. No rail. No groove.
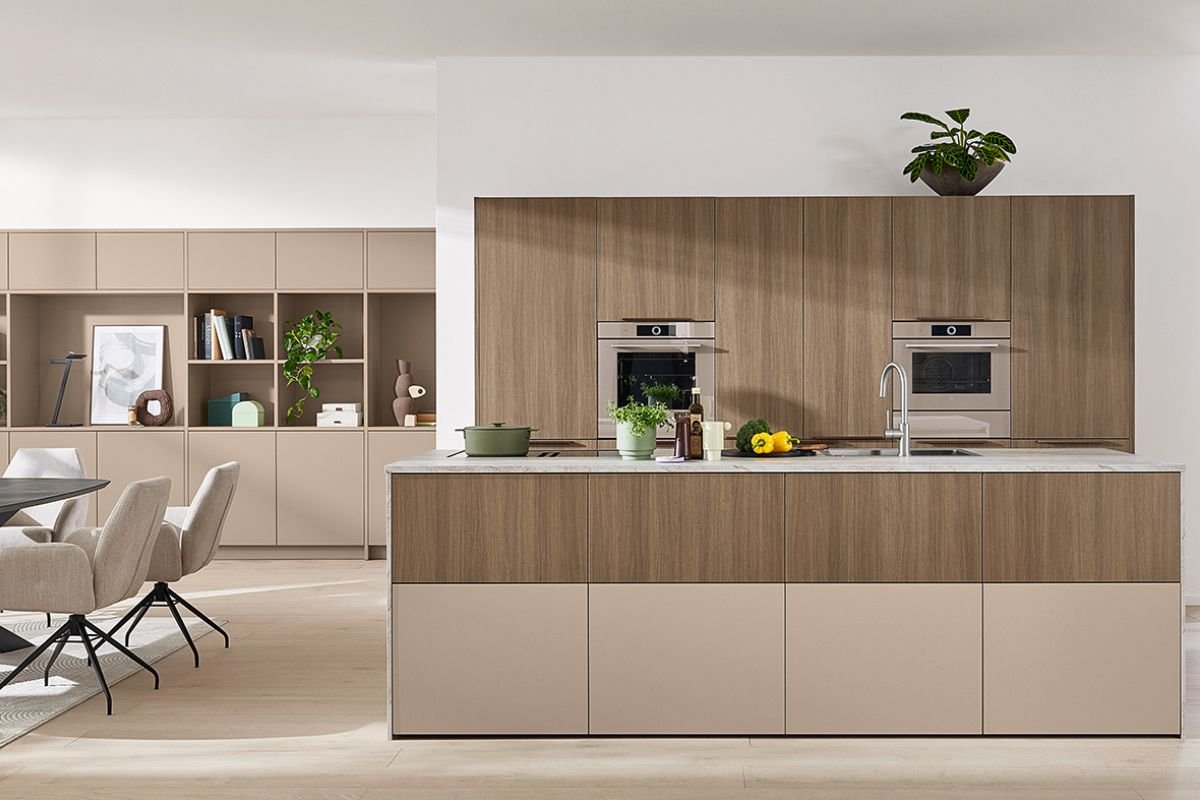
A push-to-open kitchen uses touch latches or powered drives behind doors and drawers. A light press on the front releases a catch or triggers a motor. The front moves outward so you grip the edge or continue the motion. No handle, no rail, and no routed groove anywhere on the door face. The cabinet is completely flat from floor to ceiling.
This is the cleanest visual of the three handle-free routes. Where a true handleless kitchen has a continuous rail shadow gap and a J-pull kitchen has a visible groove line, push-to-open has nothing. Every front is a smooth, uninterrupted surface. The discipline this requires from the design is significant. There is nowhere for the eye to rest except the material and colour of the door itself.
UK retailers often group push-to-open inside a broader handleless offer alongside true handleless rail systems and J-pull doors. All three are described as handleless in showroom material. Understanding which hardware route you are buying before the order is placed prevents confusion after installation.
This guide covers the hardware types, kitchen styles, appliance coordination, benefits, technical points, maintenance, and how push-to-open compares to the other two handle-free routes. Separate guides on this site cover true handleless rail systems and J-pull handleless kitchens.
What is a push-to-open kitchen?
In a push-to-open kitchen, the opening mechanism lives entirely inside the cabinet. A spring and latch hold the door or drawer shut. A gentle press anywhere in the trigger zone releases the catch and the front moves outward. On powered systems, a small motor receives the press signal and pushes the front open in a controlled, smooth movement.
The cabinet itself is frameless, in line with standard German kitchen construction. Hinges and runners carry the weight. The push-to-open components handle release and return. No external fitting is added to the door face. This is what makes push-to-open visually distinct from true handleless, which has a rail shadow gap, and J-pull, which has a groove line. In push-to-open there is nothing on the face at all.
The trigger zone is the area of the front where a press reliably releases the catch. On well-adjusted mechanical systems this is consistent and predictable. On poorly adjusted or budget-grade hardware it can be unpredictable, requiring a press in a precise location rather than anywhere on the front. Quality of hardware and quality of installation both determine how this feels in daily use.
When you review a quote, look for specific hardware language. Touch latches, mechanical push-to-open, servo drive, or knock-to-open. These terms confirm which route the specification uses. A general handleless label without supporting hardware detail needs clarification before you sign.
Read the quote carefully. The word handleless appears across all three routes. Ask the retailer to write the specific hardware type, manufacturer, and model onto the specification sheet. This is a routine request and a straightforward question. Any retailer who struggles to answer it is worth pressing further.
Completely flat fronts. No rail line, no groove, no hardware visible on any surface. The opening mechanism sits entirely behind the door.
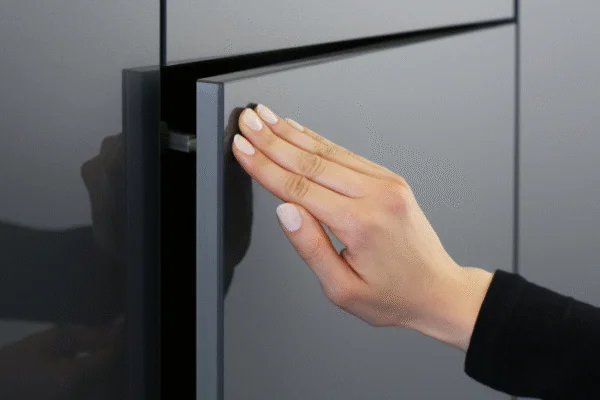
A light press anywhere in the trigger zone releases the catch. The door moves outward and you grip the edge or continue the motion.
Hardware types.
Mechanical, powered, and combined.
German hardware manufacturers supply two main routes for push-to-open kitchens. Mechanical spring systems and powered servo drives. A third category combines touch-opening with soft-close damping in a single runner or hinge unit. Each route suits different cabinet positions, loads, and project budgets.
Standard kitchen drawers sit in a load range from around 10kg to 40kg. Deep pull-outs, internal drawers with stone above, and tall waste units need runners at the upper end of this range or paired sets. Ask your designer to confirm the load rating on every unit, not just the standard drawers.
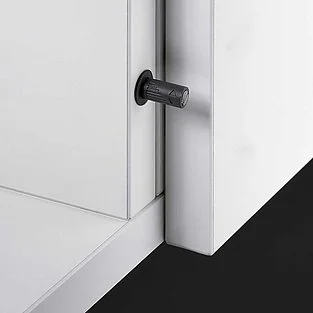
Mechanical spring and latch built into the carcass. No external fitting on the door face.

Mechanism mounted to the carcass side panel. Adjustment screws control trigger force and projection distance.
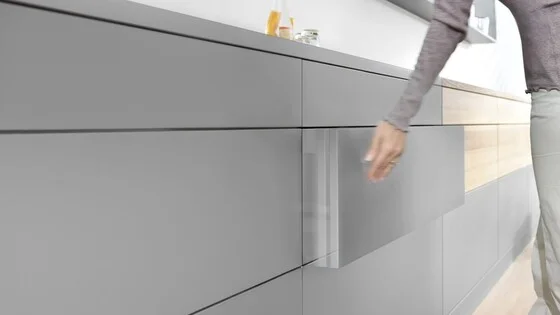
Drawer runner with integrated touch-open and soft-close. Press to open, push to close. No external latch or hardware.
Kitchen styles
for push-to-open layouts.
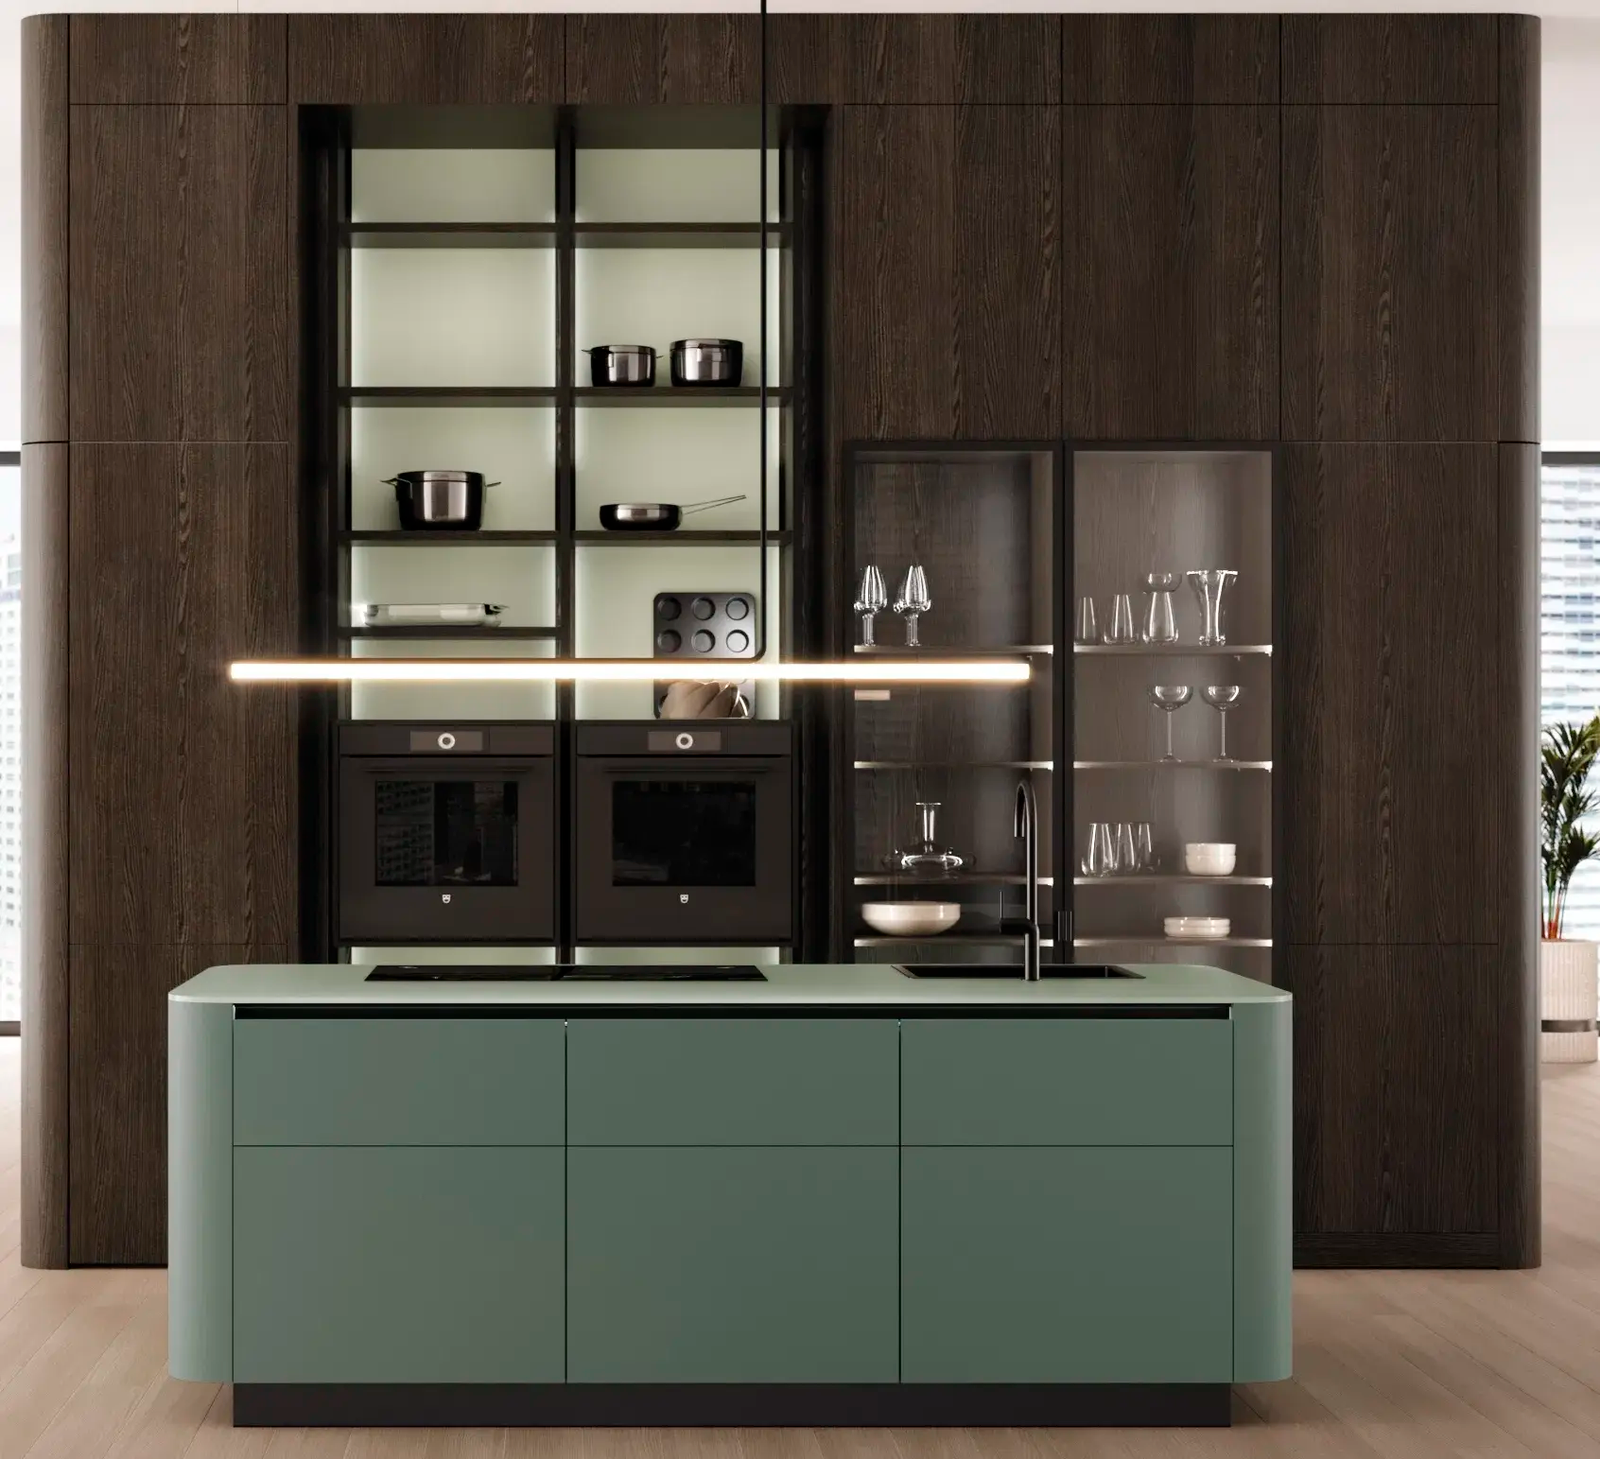
Push-to-open hardware hides entirely behind the door, so it works with most slab and lightly detailed fronts. The absence of any front-face detail means the door material, colour, and texture carry the full visual weight of the design. Styles that rely on surface interest and tonal contrast tend to produce stronger results than those which depend on hardware lines to give the kitchen visual structure.
The flattest, most resolved push-to-open kitchens are those where the designer has treated the absence of hardware as a deliberate design choice rather than a default outcome. The colour palette, texture contrasts, and lighting are all working harder because there is no hardware to contribute to the visual composition.
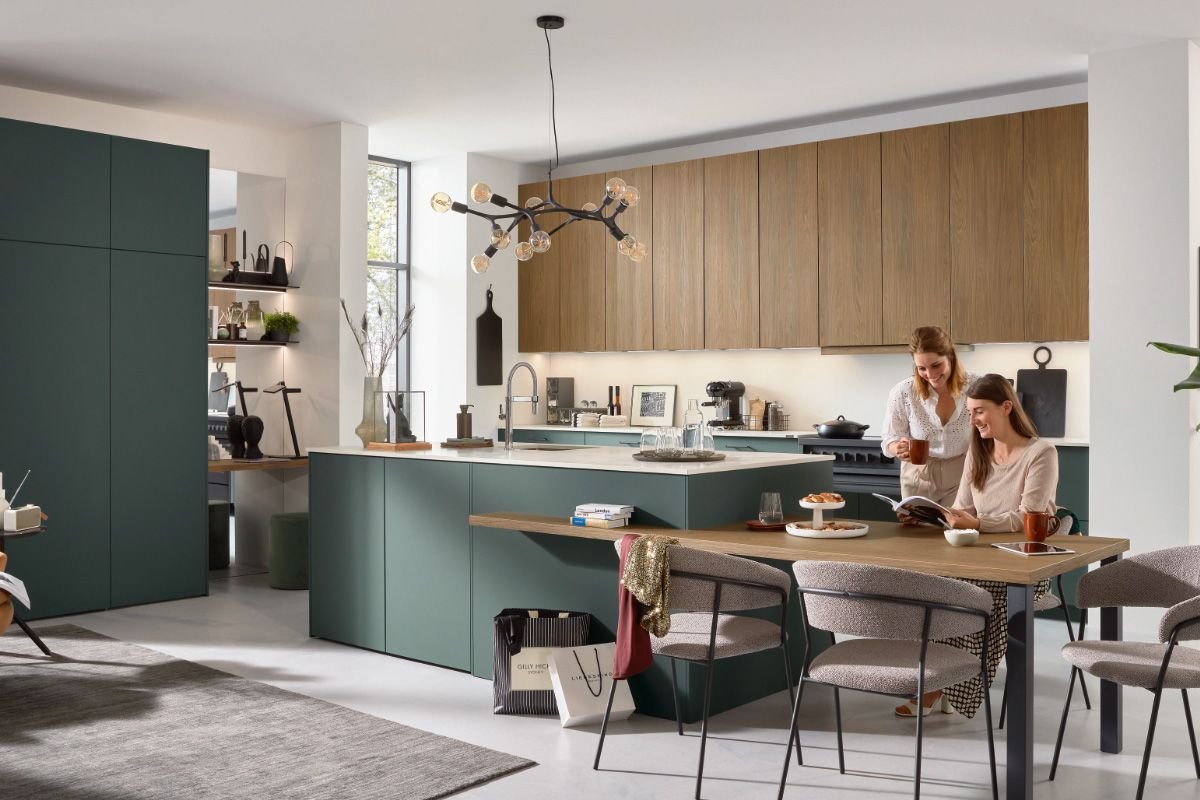
Matt slab fronts in a two-tone layout. Push-to-open removes hardware from both colours. The worktop and flooring carry the visual weight.
Push-to-open tall units alongside a handleless rail base run. A common approach in UK open-plan kitchens where each zone serves a different purpose.
Integrated appliances
and push-to-open coordination.
Modern integrated appliances support handle-free layouts through touch or knock-to-open door systems. These are independent of the cabinet hardware. Planning work at design stage aligns cabinet push latches and appliance touch systems so door clearances, power feeds, and safety functions all work together without conflict.
Appliance and cabinet systems are independent. Appliance manufacturers design their own touch or knock-to-open systems. Cabinet hardware suppliers design push latches and runners for the carcass. Your designer's role is to align both so cabinet and appliance fronts open in a coordinated way across the full kitchen.
Confirm with your designer which specific appliance models have been specified and tested for push-to-open coordination. Generic assurances that everything will work together are not sufficient. Ask to see the specific appliance model numbers on the drawing alongside the cabinet hardware specification.
Power supply planning. Where servo drives or motor-assisted appliance doors are specified, power supply routes need to be resolved at design stage. Low-voltage transformers, socket positions, and access for future service should all appear on the kitchen plan before the order is confirmed.
Benefits and limits.
- Completely flat fronts with no rail lines, no grooves, and no hardware. The cleanest visual of the three handle-free routes.
- No hardware in walkways. More clearance in tight galley layouts and island passages where projecting handles cause problems.
- Light touch opening helps users with reduced grip strength. Servo drives make heavy waste drawers and tall pull-outs accessible without effort.
- Clean styling in open-plan spaces where the kitchen is visible from dining and living areas and a hardware-free face contributes to the overall composition.
- A clear upgrade path from mechanical spring latches to powered servo drives on units where load or accessibility requires it.
- Hardware and fitting costs sit above standard handled layouts, and powered systems are among the higher-cost options in the category.
- Installation requires careful adjustment of trigger zones and front gaps on every cabinet. The quality of the installation determines how predictable the opening action feels in daily use.
- Frequent pressing in the same spot leaves marks on high-gloss and lighter-coloured door fronts faster than on handled kitchens where the grip point is the handle rather than the door surface.
- Accidental opening occurs when someone leans on a tall run or a child presses a lower front. The trigger zone has no visual indicator, so any press anywhere on the front can release the latch.
- First-time visitors to the kitchen need a short introduction. There is no obvious pull point. The opening action is unintuitive for anyone who has not used push-to-open before.
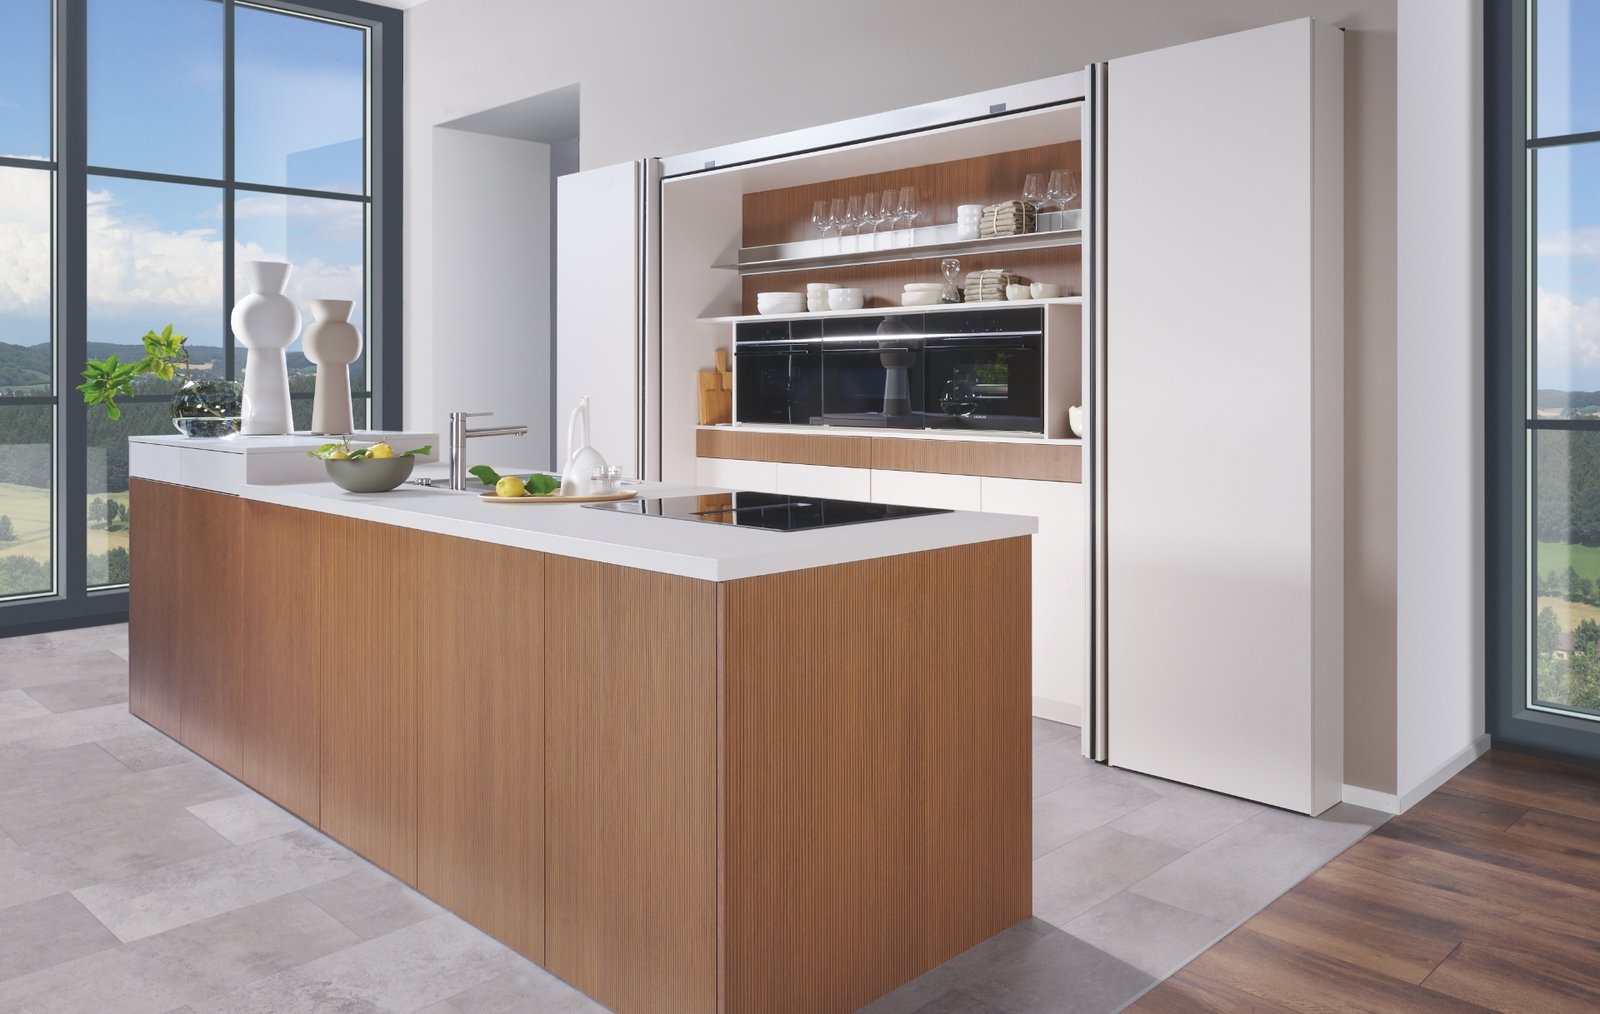
Mixed hardware in one kitchen. Many households combine routes. Push-to-open on tall larders, island units, and sideboard furniture, with true handleless or J-pull on the main cooking run where a clear grip point is preferred near the hob and sink. This gives a very clean overall aesthetic while keeping intuitive access where it matters most.
Push-to-open vs true handleless vs J-pull.
All three handle-free routes compared.
All three routes deliver a kitchen without visible handles. The opening method, front appearance, and daily experience are different in each case. This table gives a direct comparison. The true handleless guide and the J-pull guide on this site cover each route in depth.
| Aspect | Push-to-open | True handleless rail | J-pull door |
|---|---|---|---|
| Opening method | Press on the front anywhere in the trigger zone to release a latch or trigger a motor drive. | Hook fingers behind a continuous aluminium rail recessed between the door and the worktop or wall unit above. | Hook fingers into a routed groove cut along the top or side edge of the door or drawer front. |
| Front appearance | Completely flat. No rail lines, no grooves, no shadow gaps. Nothing on the face of any front. | Flat faces with consistent horizontal or vertical shadow gaps where the rail sits. | Visible groove lines across each door and drawer front. A horizontal detail that reads across the room. |
| Clarity for guests | No obvious pull point. Visitors need a brief introduction to the opening action. | The rail gap is visible and the grip point becomes clear once a visitor sees it. | The groove line guides hands toward the pull area. Intuitive once seen. |
| Accidental opening | Leaning on a tall run or a child pressing a lower front can trigger opening. No visual deterrent on the face. | A deliberate grip is needed. Accidental opening is less likely. | The groove requires a specific motion. Accidental opening is uncommon. |
| Heavy appliance doors | Servo drives handle heavy fronts well. Mechanical latches need accurate calibration on heavy integrated doors. | The full-length rail gives a strong, comfortable grip on heavy fridge freezers and tall larders. | The groove provides less support on heavy doors. More effort required on tall integrated appliances. |
| Typical cost position | Higher than standard handled layouts. Powered systems are among the most expensive options in the category. | Often similar to push-to-open with servo drives in the same brand and carcass tier. | Typically lower than both rail-based systems. A handle-free aesthetic at a more accessible furniture budget. |
| Best match | Projects targeting a completely flat, hardware-free aesthetic with high design intent. Open-plan spaces where the kitchen is on display. | Projects where strong continuous rail lines suit the scheme and a reliable, intuitive grip on integrated appliances is a priority. | Projects where a handle-free look is the goal and a visible grip point still feels helpful. Budget-conscious specifications. |
Ask for three prices on one scheme. When you shortlist layouts, ask the showroom to price the same cabinet quality and appliances in push-to-open, true handleless, and J-pull. Review the drawings and totals side by side. The visual difference between routes is clearest when you are looking at the same kitchen, not comparing different projects.
Technical and installation points.
Care and longevity.
Cleaning touch zones. The area of the door front pressed most frequently picks up grease and fingermarks faster than the rest of the surface. Clean these zones with a soft cloth and a mild cleaner suited to the specific door finish. Avoid abrasive pads and strong solvents on edges and corners. The same area is also where the lacquer, foil, or laminate facing takes the most wear over time. Gentle, regular cleaning with the right product extends the life of the finish significantly more than infrequent heavy cleaning.
Adjustment over time. Hinges and runners settle during use. Most push-to-open components include multi-way adjustment for projection, trigger sensitivity, and gap consistency. A short service visit every year or two keeps gaps even across the run and maintains consistent trigger behaviour. This is particularly relevant on servo-drive systems where a small shift in alignment can change the feel of the opening action noticeably. Most German hardware suppliers publish adjustment specifications that any competent kitchen fitter can follow.
Hardware longevity. Quality components from recognised hardware manufacturers carry long cycle-test ratings and confirmed spare parts availability. Before you order, ask the showroom which hardware brands they specify for push-to-open, and how future support and parts replacement works. The answer to this question often reflects the wider service level you will receive from that retailer.
Flat fronts in a family kitchen. Regular cleaning of the trigger zones keeps the surface in good condition through daily use.
The most important maintenance question to ask before you order. Ask the showroom how long spare parts for the push-to-open hardware are guaranteed to remain available, and what the process is for requesting a service visit in the first few years after installation.
Is push-to-open
right for you?
- You want the cleanest possible handle-free aesthetic. No rail line, no groove, no shadow gap. Completely flat fronts from floor to ceiling.
- The kitchen is in an open-plan space where it is permanently on display from a living or dining area and visual calm is a priority.
- A household member benefits from light-touch opening. Reduced grip strength, arthritis, or other physical considerations make a conventional pull action uncomfortable.
- You want integrated appliances to match the flat-front look of the kitchen. Touch or knock-to-open fridge, dishwasher, and oven fronts are part of the specification.
- You are comfortable briefing guests briefly on how the kitchen opens and do not find the absence of obvious grip points a practical concern.
- Young children use the kitchen regularly. Accidental opening of lower fronts and tall larder doors is a consistent issue in households with small children.
- The kitchen is used by several people of different ages and familiarity with push-to-open, where an intuitive grip point reduces confusion and accidental misuse.
- Budget is the primary constraint. Mechanical push latches are manageable but powered servo systems add meaningfully to the furniture cost.
- You have high-gloss or light-coloured fronts and are not prepared to clean the trigger zones regularly. Fingermarks accumulate faster on reflective and pale surfaces without a handle to absorb the contact.
Test it in a showroom before you decide. Open a pan drawer, a tall larder, and a dishwasher front in push-to-open. Then do the same in a true handleless rail kitchen and a J-pull kitchen. Ask a member of your household who was not involved in the design process to try each one without instruction. The route they find most intuitive is often the right answer. Also see the true handleless guide and the J-pull guide on this site for full comparisons of all three handle-free routes.